How to Print a Tattoo Stencil at Actual Size
Take your stencil PDF from the screen to a correctly sized paper proof. Check the ruler, orientation, and sheet alignment before using your transfer paper.
Choose artwork to preview a stencil.
Print at 100% or Actual Size.
JPG, PNG or WebP. Your artwork stays on this device.
Enter the finished artwork width
Open the tattoo stencil maker and load the approved drawing. Check the stencil preview before choosing a size. A faint stroke that disappears or an isolated speck that stays near the edge can change the bounding box. StencilScale measures the visible linework after trimming the empty border. It uses the entered width for that linework and calculates the height using the same proportions.
Enter the width in millimeters or inches. For example, enter 4 inches for a design that should measure 101.6 mm at its widest point. If the client gave you a height, use the preview’s width and height readout to adjust the width until the height matches the request. Recheck the final dimensions any time you change the cleanup strength or replace the source file.
Choose A4 (210 × 297 mm) or US Letter (8.5 × 11 in) to match the paper you will load. The sheet preview shows how many pages the art requires. Plan for more than one sheet when either dimension exceeds the printable area.
Keep the PDF at 100% in the print dialog
- Select Download print PDF. Save the PDF and open the saved file in a viewer or printer app that lets you control print size.
- Confirm the printer and paper size. Choose Actual Size, 100%, or the equivalent setting. Disable options such as Fit to page or Shrink oversized pages. Check the driver’s own settings if they include a separate scaling control.
- For a tiled job, print page one on compatible plain paper first. Keep any duplex or multiple-pages-per-sheet layout off so the PDF pages stay separate. Use a printer that supports plain paper for this check.
- Measure the 50 mm calibration line in the sheet margin with a ruler. Align zero with one endpoint and read at the other. When it measures 50 mm, also check the design’s overall width if it fits on that sheet.
For example, a 50 mm line that measures 48 mm indicates that output was scaled to about 96%. Find and correct the scaling in the print path, then print a fresh proof. Entering a larger width in the editor can hide the problem for one job and give the wrong size when you switch devices or print settings. If your mobile app only offers automatic fitting, try a PDF viewer or desktop print path with explicit scale control and verify again.
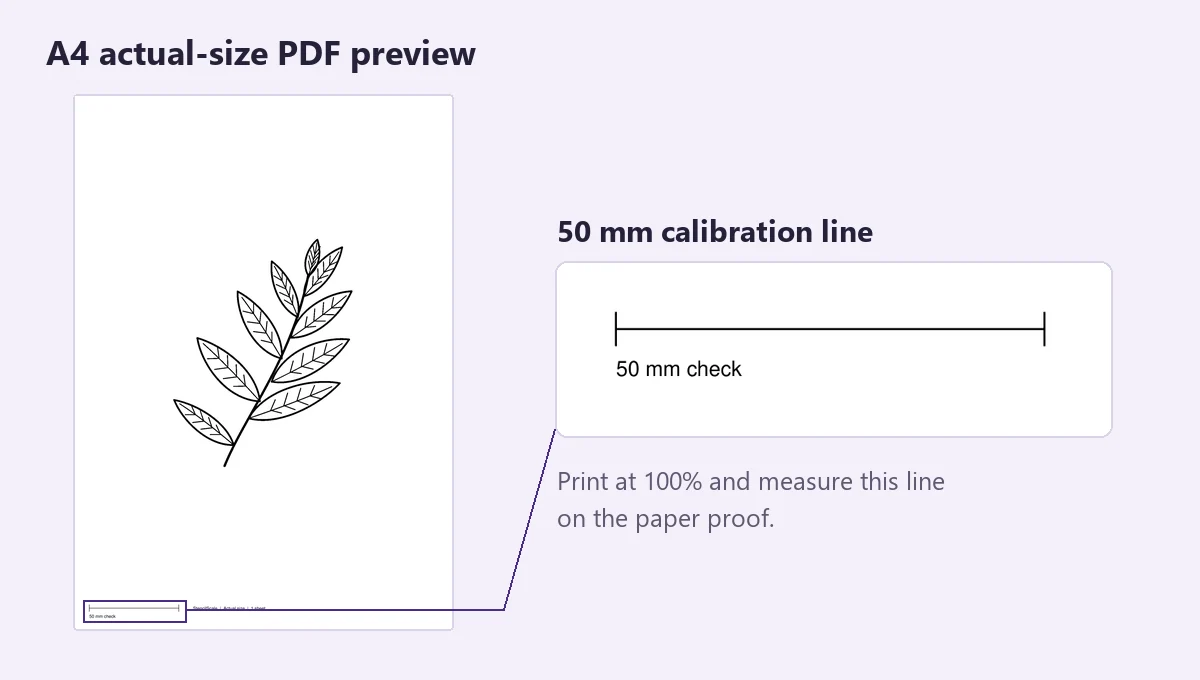
The actual A4 export and a close-up of the PDF calibration line. Measure this line on the printed proof.
Check orientation once in your workflow
The Mirror stencil control reflects the preview, PNG, and PDF from left to right. On the proof, check a feature you can identify at a glance, such as a word, a signature curve, or a detail on one side. Decide which way that feature should face in the finished transfer. Your print application or device may have a separate mirror setting. Check the combination on a test sheet so the image is reversed the intended number of times.
Assemble a multi-sheet stencil using the overlap
StencilScale splits large artwork into sheets that share a 6 mm overlap. Keep the sheet labels visible while you lay the pages out. Start with row 1, column 1. Match the next column along the right edge and the next row along the bottom edge. Align the repeated linework in the shared area over a light surface before you secure the seam.
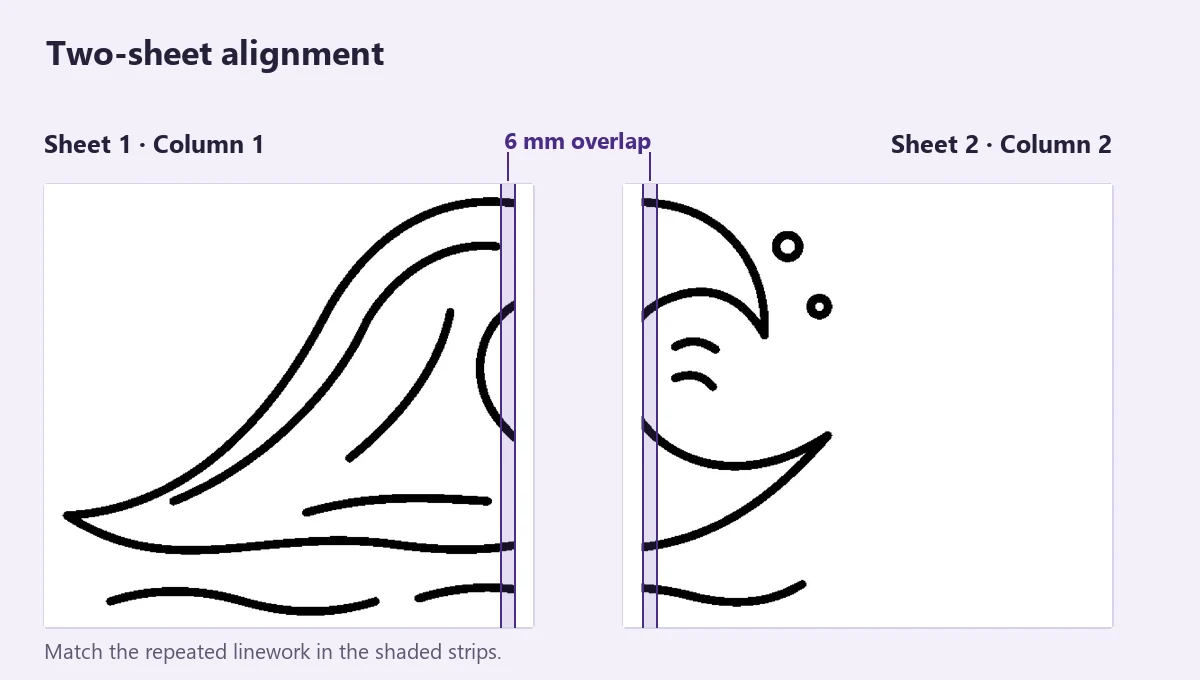
Two pages from an exported PDF. The shaded 6 mm strips contain the same part of the design.
At each seam, check two distinct points if the artwork gives you enough features. A long straight stroke can line up while one sheet is still slightly rotated. When the repeated linework sits together, secure the pages for the proof and remeasure the full design. Use the proof to confirm order, scale, and orientation before arranging the transfer material.
If the proof is clipped or stretched
Start by confirming the paper size and test again with the driver set to 100%. Check whether your printer’s hardware margins crop a corner at that size. If the calibration line is correct but a line of artwork is missing, inspect the exported PDF on screen to distinguish a clipped print from missing linework in the file. Use a suitable print path, paper size, or a tiled layout that gives the artwork enough room.